
Darkroom Printing- A Harmony of Art and Science
Written by Nancy Guidry
Rules are meant to be broken, especially when talking about photography. However, when printing in the darkroom, it’s a good idea to get a firm grasp on the fundamentals before moving on to a more experimental approach. Knowing what makes a good darkroom print, and being methodical in your technique will aid you in your creative journey and bring your black and white photos to life in the form of beautiful prints. You’ve already got the basic knowledge to be up and running in the darkroom, but you’re ready to take your printing to the next level. I find that working in the darkroom is a perfect blend of science and art. Being diligent and organized with the analytical and scientific side of things will ultimately make the creative process easier and more effective. Speaking as a production printer who has to work through a number of different orders and comply with a variety of printing requests, I cannot stress enough how invaluable it is to be organized. Making sure your setup is thorough and consistent and keeping a printing log will help you to replicate a print in the future or give you a starting point from which to make changes. Breaking the rules of printing is fun and exciting, but it’s even better when it comes from a place of control and understanding.
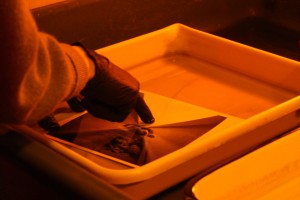
I started out printing in the darkroom in high school, printed all through college and have been working in photo labs ever since. My biggest mistake in the early years was not respecting the chemistry in which I had my hands every day. Know this- chemical allergies are real and they are cumulative.Thus, it is important to practice safe and long lasting printing habits. The more you print, the better you get and the more you expose yourself to the chemical ingredients. So please, ALWAYS wear gloves and make sure your darkroom is well ventilated. Take it from me, you do not want to develop an allergy to the chemicals. It’s really not fun.

Gloves are good!
Getting Set Up
Set out your trays and make sure there is at least 1.5 inches of chemistry in each tray. Fiber paper is prone to curling slightly at the edges, and you want to be sure that the entire paper surface is immersed in the chemical bath.
Check that your chemicals are good to go and not exhausted. Expose a small piece of photo paper to white light. Develop and fix as usual. If the paper turns black, your developer is good. If it’s not quite black, your developer is exhausted. Hold on to this swatch of black paper, it will come in handy later. A couple drops of hypo check in your fixer will let you know if the fix is still good. If the hypo check stays clear, it’s good to go. If the hypo check turns a milky white, don’t use it, remix. Keep track of the dates that you mix chemistry. It’s always a good idea to use fresh chemistry (mixed within the last week or so and stored in an air and light tight container).
Make sure that the enlarger you’re using is set up for the film format you’re printing. Some enlargers have removable condensers that you need to swap out for printing different film formats, others will have a knob that adjusts the condensers for different formats. Be sure to use the appropriate focal length lens for the film format you’re printing. If you use an enlarging lens designed for 35mm when printing a 6x6cm negative, you will experience exposure fall off around the edges of your image. 50mm is the standard focal length for 35mm film, 75mm for 6×4.5cm, 80mm for 6x6cm, 90mm for 6x7cm, 105mm for 6x9cm and 135mm or 150mm for 4×5 film.
A lesser known quality of enlargers is that they can come out of alignment. I’ve had it happen where a print was in focus through the center and right side, but the grain on the left side of the print was soft. If you experience this or other weird focus issues with your prints, check your enlarger’s alignment. Break out your level and make sure that the baseboard, negative stage and lens stage are all level and parallel. Be sure to check the level both from side to side and front to back. If all these components are in line, move on to check the paper easel. If you find that any part of your setup is misaligned, you’ll need to adjust it. On most quality enlargers, there are set screws on the enlarger frame that allow you to adjust the angle of the enlarger head; the negative stage and lens stage should have set screws toward the back of each component. Make small adjustments: one at a time until you are able to get everything level. This process can make you want to tear your hair out, but it’s worth it. If everything on your enlarger is aligned and you’re still seeing focus abnormalities, check to see if your negative is lying flat in the carrier. You can sandwich your negative between glass if necessary.
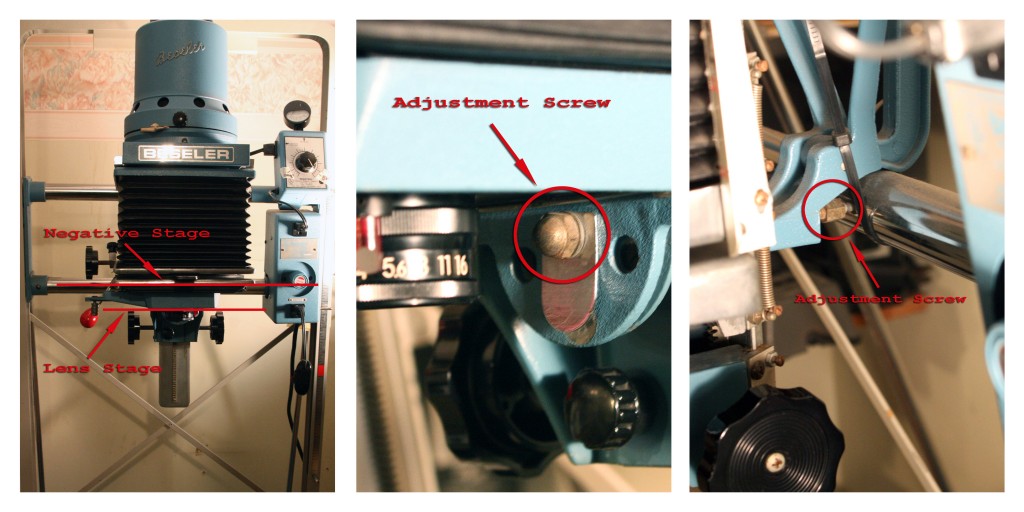
Here are the adjustments for a Beseler 45 enlarger.
Now you’re ready to start printing!

The negative.
Printing
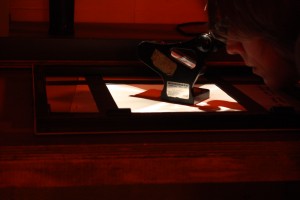
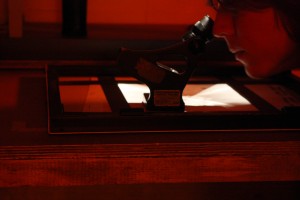
Now that your enlarger is aligned and your negative is flat, it’s time to make sure that your print will be thoroughly in focus. I’ve often seen prints that have great exposure and tonality, but weren’t in focus all the way across. It’s a shame because it’s such an easy thing to remedy. Check that your negative is in focus from corner to corner by not only checking the grain focus in the middle of the image, but in all corners of the print area. Stop your lens down two stops from wide open for maximum sharpness. Film grain is good. It means that you’re shooting film and enlarging from negatives. Let that grain shine through in all its sharpest glory.
The easiest way to be efficient in your printing is to make good test strips. This does not mean making test strips that look good, but rather, making test strips that will be the most helpful. Select a portion of your negative that has as many exposure variants as possible and shows a section of the main subject as well as the background. Be sure to orient your test strip so that each different exposure shows the broadest range of shadows and highlights possible. This gives you a much better idea of where your base exposure should be and which areas of the image will likely need dodging and burning.

The horizontal test strip looks nicer, but the vertical test strip shows a better range of exposure.
You want to make sure that your print has a rich black, a good white and as many shades of gray as possible. Remember that black piece of paper you used earlier to test your developer? Keep it in the fixer tray. When you put a test strip or print in the fixer, you can float this black paper over the blackest parts of the image to make sure that they are, in fact, true black. Notice I say to float this swatch in the fixer tray. Some papers (especially Ilford) will not display a true black until they are exposed to fixer.
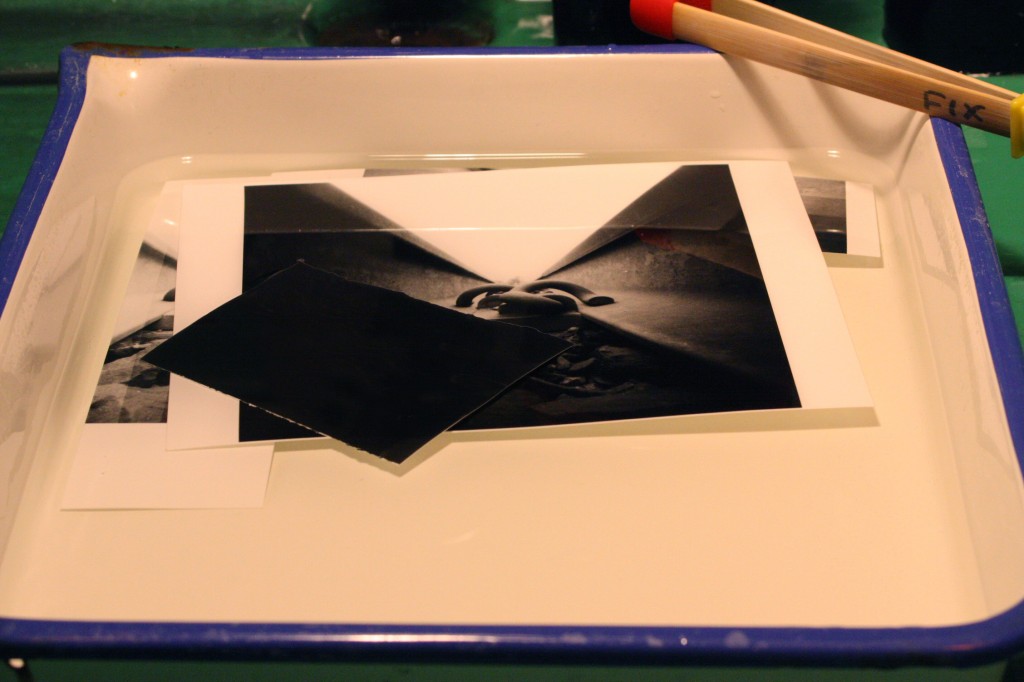
Use your black swatch of paper to ensure a true black in your print.
This brings us to the topic of split filter printing. Let’s say that you’ve made your first work prints using a #3 filter. Your image has a good exposure, but you need a true black and a #3 ½ filter is just too contrasty. Try giving it an extra second or two using a #5 filter; this can be just enough to make your blacks pop without increasing the overall exposure of the image. You can give your entire print the extra time with the #5 filter, or you can selectively burn parts of the image this way. Working with a number of darkroom printers throughout the years, I’ve known quite a few who use split filtering as a rule for every image. Personally, I don’t agree with that style of printing. It can be handy when your image needs it, but working with higher contrast filters increases grain size and has the potential to undermine the delicate shades of gray you’ve worked so hard to achieve. So keep it as a tool in your ever expanding tool box, but don’t rely too heavily on this method.
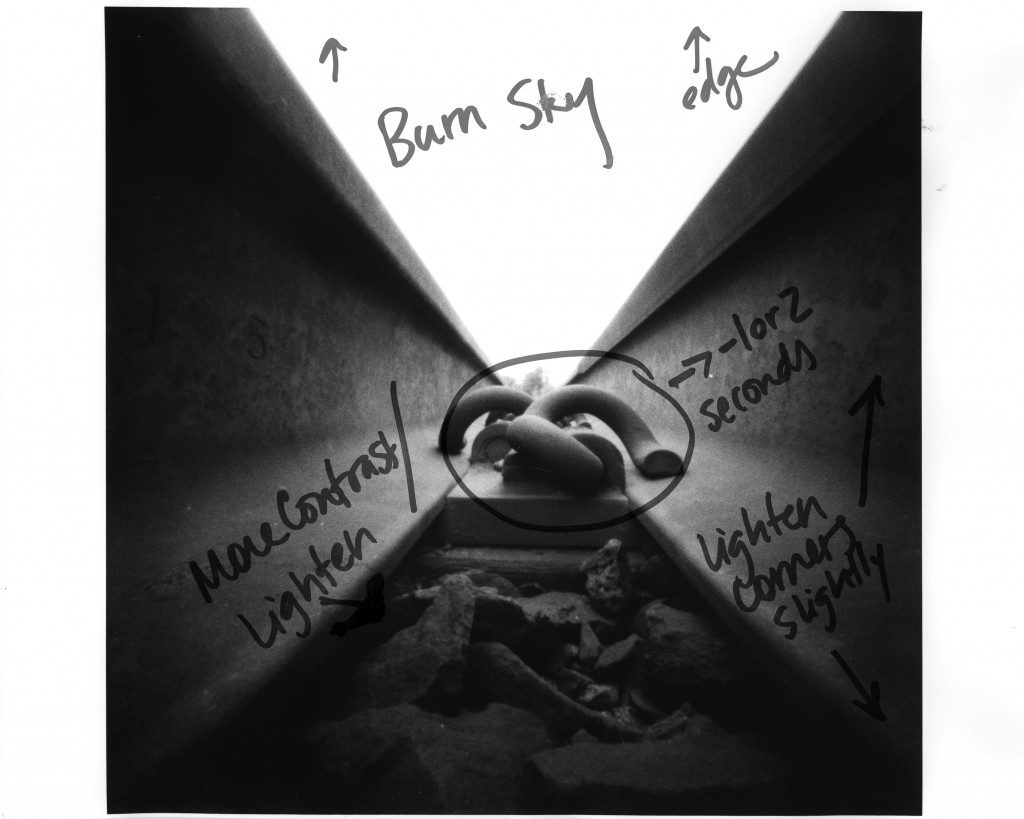
Work print with notes.
Let’s talk about dodging and burning for a second. The best dodging and burning happens when you can’t tell that the image has been manipulated this way. Some printers use tools for this: cardboard or plastic shapes attached to a wire, or the cardboard pac-man shapes favored by most of the printers at Blue Moon. My personal preference when it comes to dodging and burning tools is using my hands. Maybe this is because my favorite photo teacher of all time once said,”You’ll never be a real printer until you only use your hands to dodge and burn.” I also think that hands make much more organic shapes than tools and make the dodge and burn less obvious. Use whatever tools you like, just be sure that your dodging and burning blends in well and doesn’t stand out.
Did you know that your eye is usually drawn to the lighter portions of a photo? Make use of this fact to help guide your viewer’s eye to the most important parts of the image. You might also find that blown out portions of the background are distracting; bringing down the tone of these areas will make them less distracting. Burn in those hot spots using a lower contrast filter than you used for the overall exposure. If you want to have a more dramatic effect while pulling the viewer’s eye to the center of the photo, consider burning in the edges and corners to create a vignette effect.

You can clearly see the burn in this print. No good.
One of my biggest pet peeves is when images don’t have good edges. You’ll want to make sure your image has clearly defined edges distinguishable from the white paper border around the image. You don’t want your image to bleed off into the unexposed portion of the paper. Think of it as the period at the end of your sentence- the image stops here. If you have a stubborn blown out edge, you can burn in the edge using a lower contrast filter than you used for the overall image. If the edge is really stubborn, try flashing that portion of the paper either before or after making your exposure. Flashing paper is a technique used to create a base fog on photo paper. Perfect for those times when, no matter how long you burn it in, that one highlight just won’t come in. You’ll want to flash your paper while it’s in the easel under the enlarger, but without a negative. Exposure times for flashing paper are usually very short and rarely exceed 2 seconds or so. This technique can be used either on the entire sheet of paper or just on specific portions. It can be a tricky skill to master, and is mostly achieved through trial and error. It took me quite a few printing sessions to get the hang of it and not have it look obvious, but when it works, it works really well.
Paper processing tricks
Handle your paper delicately. When you put your paper into the trays, be careful not to kink the corners by gripping them too tightly or folding the corner you’re holding. This is especially important when printing with fiber based papers as they go limp when saturated with chemistry or water.
It’s a good idea to put your paper in the tray image side up so that you know the image surface is immersed in the chemistry. If the paper is face down, there could be an air bubble trapped underneath, which will cause a spot of non-development or under-development. It’s pretty frustrating when you pull a good print only to realize, after you’ve put everything away, that it has little spots of underdevelopment. So I always put my prints face up in the developer to avoid these unfortunate surprises. I like to agitate my developer by rocking the tray. Avoid poking the paper with tongs, as this could lead to dents and kinks, and if your tongs are dirty, could leave smudges on the paper.
You can vary the look of your print with different agitation techniques and different developer temperatures and dilutions. A lower developer temp will yield a lower contrast image, while a warmer developer temp will yield a higher contrast image. Using a warm or hot developer can be useful when trying to improve contrast of a flat image. Developer dilution can also affect processing results. With a more dilute developer, developing times will increase, and the tones of the image will have less contrast. Conversely, a more concentrated developer will be more active, shortening developing time and giving the image more contrast. Agitation will also affect the activity of the developer. Aggressive agitation will cause the developer to be more active, decreasing development time. This can be useful if you want a particular part of the image to develop more than the rest of the image. You can take your GLOVED fingers (really, wear gloves) and run them back and forth over the part of the image you want to develop more to increase the amount of development in that area. This can be another useful trick when trying to bring in the tone of highlights. Conversely, let’s say that the top of your image looks perfect, but the bottom needs longer development: you can pull the top portion of the paper out of the developer and leave the bottom of the paper in longer. If you’re using this selective development method, make sure to keep a gentle agitation going, or else you’ll end up with an obvious line where the paper was lifted out of the developer.
Selective agitation in the developer tray.
Now that you’ve worked so hard to make these beautiful prints, you want them to last. Be sure that your print is fully fixed and washed well. Typical time in the fixer bath is 5 minutes, although if you’re using rapid fixer, the recommended fixing time can be a bit shorter. I like to give each print a full five minutes in the fixer just to be sure. To get an archival print, you’ll need to wash all the fixer out of the paper before you lay it out to dry. At Blue Moon, we conform to the archival standards of the Library of Congress. These standards require that photo prints be washed in water for 5 minutes, placed in a hypo clearing agent for 5 minutes and then washed in water again for 30-45 minutes. You can add a small amount of Selenium toner to your hypo clear bath, which aids in the stabilization of the print, and is considered the best way to ensure that your print is archival. Believe me, it’s a total bummer to find that your prints have yellowed or developed spots of discoloration after a few years. And that’s the thing, you won’t notice if your prints haven’t been washed properly for a long time, years even. So be diligent and do it right, it will save you some heartache in the future. When you take your finished prints out of the final wash, use a squeegee to squeeze excess water off the surface of your print. You want to make sure that your squeegee and the surface you’re using are clean. After all, no point in negating all that wash time, right?
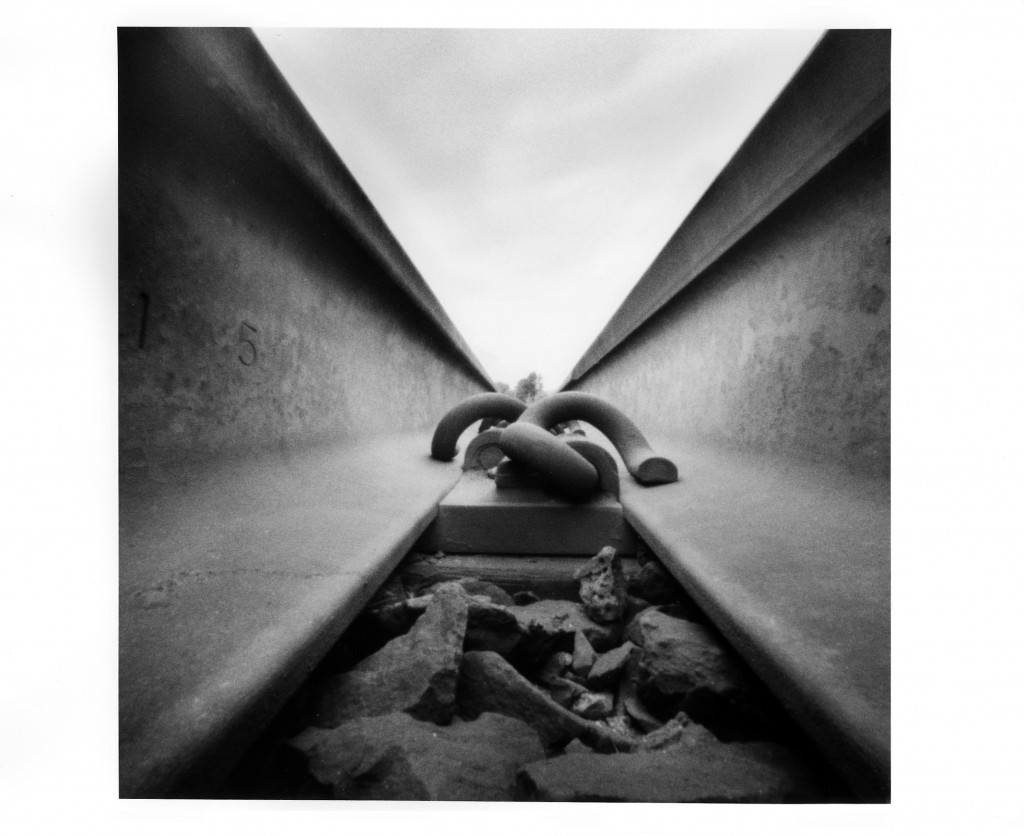
The final print.
Finally, remember that printing in the darkroom, like any other aspect of photography, takes time and practice to master. If you’re having a bad day in the darkroom or if you’re frustrated with a print that you just can’t seem to get right, come back to it another day. Sometimes a fresh perspective is all it takes. Keep good notes on everything you print. Be methodical. Pay attention to details when you’re setting up and printing. Appreciate the science behind the printing process, and let it guide your artistic process. The more consistent you are in your approach, the more consistent your results will be. Try and try again. Have fun with it. And once you’ve mastered these rules of printing, start experimenting. Try something new. Try something weird. Let the magic of seeing your image develop in the tray wash over you. Get creative and remember, ALWAYS WEAR GLOVES.